#An exhaustive guide to taking screenshots in Windows 11
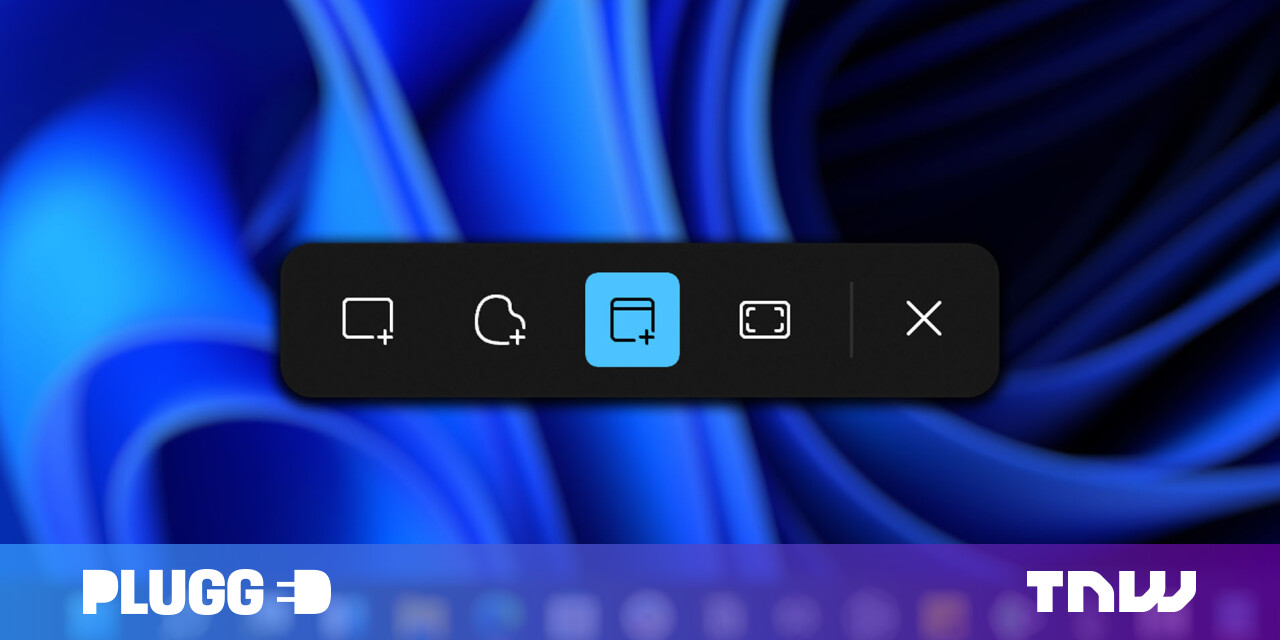
Table of Contents
“#An exhaustive guide to taking screenshots in Windows 11”
I mean, taking a screenshot shouldn’t be too confusing right?
Unfortunately, Windows has a bit of a spotty history with taking screenshots, given Microsoft has implemented a multitude of ways of capturing them. But fret no more, we have you covered here at TNW Basics.
The best way for most people
For most people, the easiest way to take a screenshot regularly is using the shortcut Win+Shift+S to activate the Snipping Tool (by ‘Win,’ we mean the key with the Windows logo).
The built-in screenshot tool got a big makeover for Windows 11 and offers four different ways of capturing your screen, with corresponding buttons at the top of your screen. From left to right:

Rectangular snip: Draw a rectangle over the area you want to capture. Simple enough.
Free-form snip: Draw any shape you want to capture. Want to capture an image in the shape of a badly drawn star? This is how you do it!

Window Snip: This mode is really handy if you want a clean capture of a specific window or dialog box. Simply hover over the window and it’ll be highlighted. Click once and you’re good to go.
Full-screen snip: This is the mode you want if you just want to take an image of everything on your screen(s). This can be especially handy if you have multiple monitors, as the rectangular snip is unable to capture everything on mismatched display sizes.
Important! By default, capturing a snip using this method will simply copy the image to your clipboard. This allows you to easily paste the image into an app like Photoshop, Microsoft Word, or the messaging service of your choice. However, if you were hoping to keep your snip forever, you’ll have to manually save the image.
After you capture a snip, you should see a notification pop up on your screen. If you missed it, just click on the time and date at the corner of your screen to enter the notifications menu.
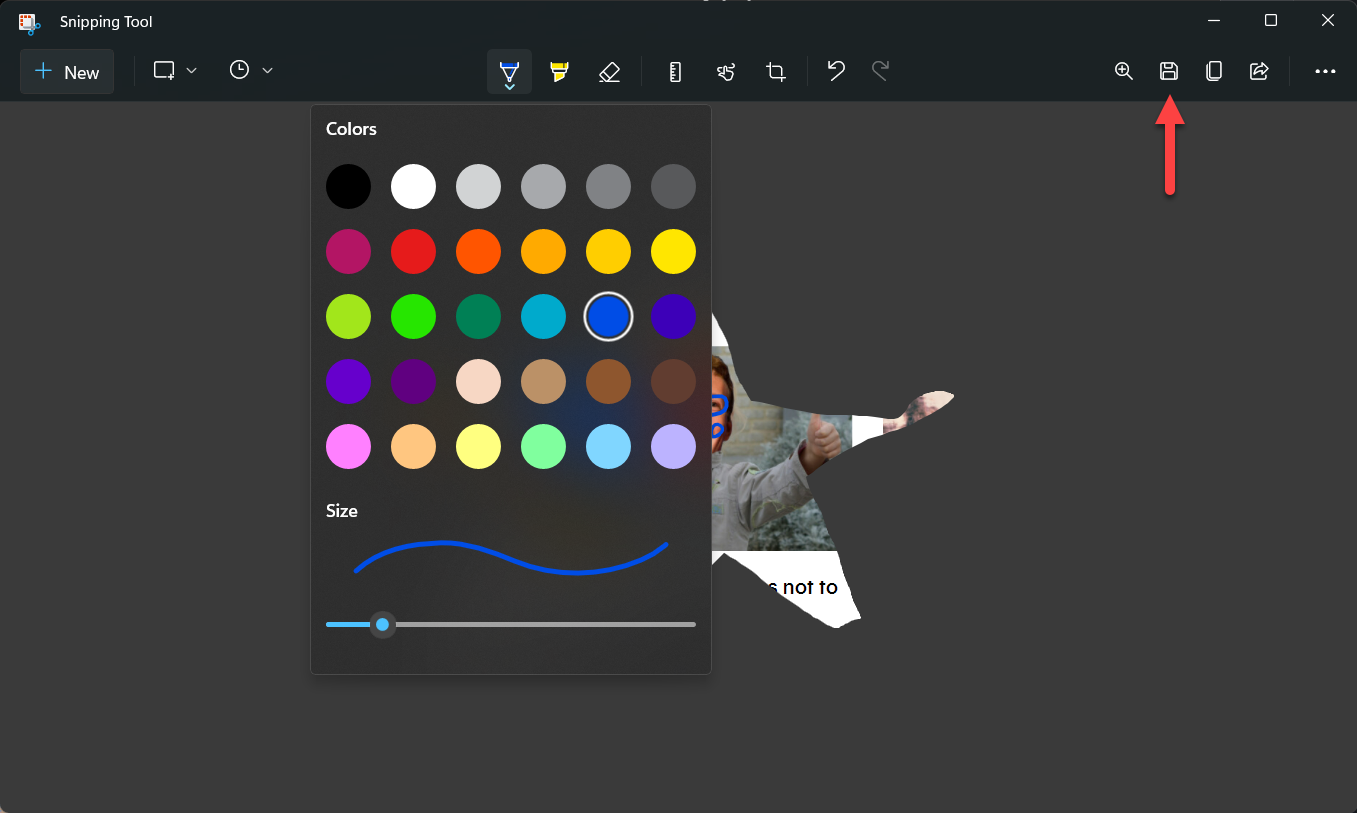
Click on your snip and you will enter the Snipping Tool app. From here you save your image by clicking on the button on the upper right (or just press Ctrl+S).
You can also modify an image before you save it as well. You can crop the image or annotate it with a variety of pen and highlighter colors. There’s even a ruler and a protractor should you want to make your lines real pretty.
Delay your snips
As an alternative, you can enter the Start menu and type ‘Snipping Tool’ in the search bar or locate it under “all apps.” This will open the Snipping Tool’s editor, as opposed to just throwing you right into capture mode.

The advantage of opening the app this way is that you can now set a delay for a snip, which can occasionally be handy if you’re trying to capture a disappearing UI element. While this isn’t usually a problem in Windows 11 (it used to be the case that menus would often disappear when you move your mouse away while taking a screenshot) you never know when you might need it. You have the option to set a delay for 3, 5, or 10 seconds.
For quick and easy captures
Let’s say you just want to quickly save an image of your screen but don’t want to deal with the selection and saving process. Perhaps you’re doing time-sensitive work and can’t afford such distractions, or you need to capture multiple images in quick succession. You can always crop and edit the images later, after all.
In this case, Win+PrtScn is the shortcut for you. Pressing that button com will simply capture everything on your monitor(s) and automatically save an image in your Pictures > Screenshots folder.
Some keyboards may not have a PrtScn button, or the button might play double duty with another function. No problem: just press Fn+Win+Spacebar instead for identical functionality. I actually use this shortcut more often on my laptop, as it’s easy to reach with my left hand.
If you only need to copy everything that’s on your screen without automatically saving it — well, that’s exactly what the PrtScn button was born to do when used without any additional keys.
How to record a video of your screen
What if you need to capture a video of content on your screen? Luckily Windows has a built-in tool for this as well. While it’s aimed at capturing game clips and can only handle one app at a time, the Windows Game Bar is the easiest way to capture video using built-in tools.
To start recording immediately, simply press Win+Alt+R. By default, this will begin to capture video and audio for whatever your active application is. You can also tap the microphone icon in the recording pop-up to enable your mic, should you want to record your own voice alongside your video content.
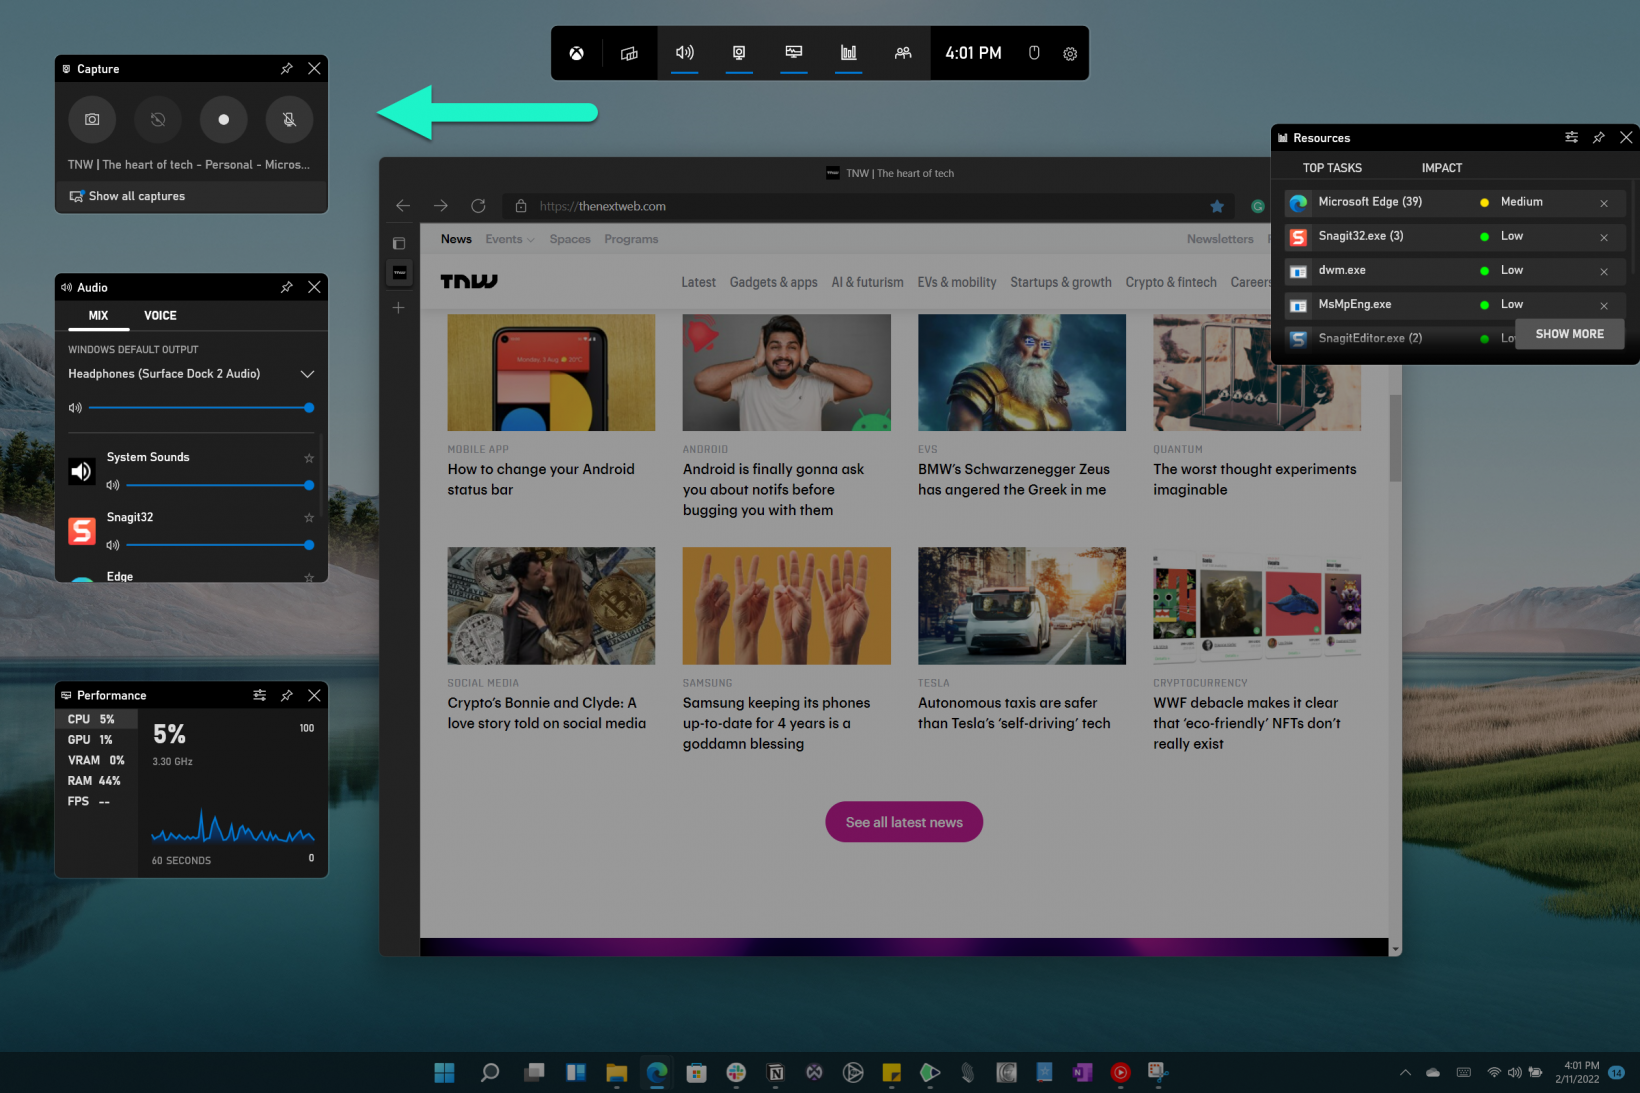
For a little more control, you can press Win+G to enter the Game Bar interface. You should see several small windows pop up, but we’re concerned with the one labeled ‘capture.’ If you don’t see it; you can tap on the camera icon in the menu bar near the top of your screen to open it up.
From the Game Bar, you can adjust the settings for your recording. For example, you may only want to capture sound for one app, or you may want to do so for every app you have open.
If you need yet another way to capture a screenshot, you can also use the Game Bar’s capture menu to take screenshots as well; the shortcut for this is Win+Alt+PrtScn. Note that, unlike previous shortcuts, this will only capture the active window.
Your Game Bar videos and screenshots will be saved in your PC’s Videos > Captures folder.
For the pros
Windows 11’s built-in Snipping Tool and Game Bar will likely suffice for most users, but if you need to capture screenshots multiple times a day, it might be time to install a heavy-duty screen capture tool.
In my case, I often need to know the exact size of a screen capture or create gifs from a video — neither of which the built-in tools allow.
There are a number of good free applications for this. Greenshot and ShareX are two popular open-source options you should check out.
But if your day-to-day work relies on a multitude of screen captures, I highly recommend considering Snagit ($50, with a 15-day trial). I’ve been using it for a few years now, and have found it to offer the best combination of functionality and simplicity of any screen capture software I’ve tried.
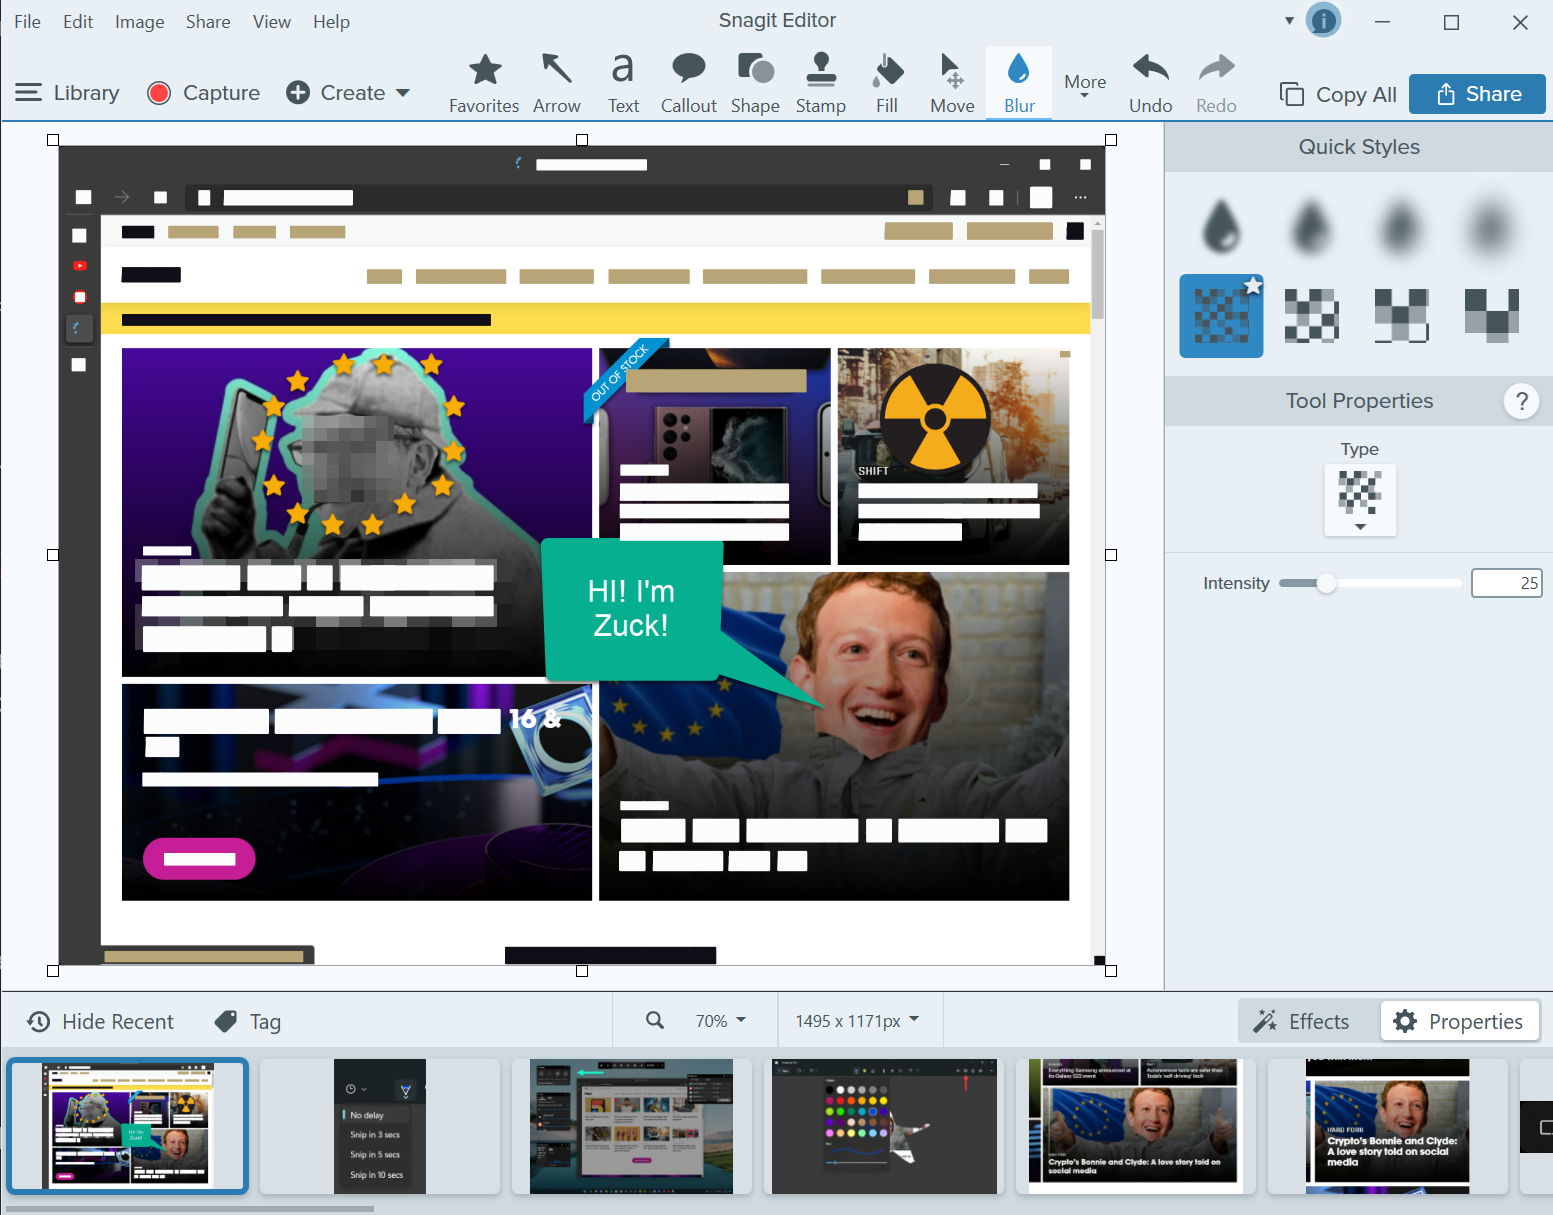
Some features offered by Snagit that aren’t available with stock Windows 11 tools include:
- Scrolling screenshots (such as for capturing a long web page)
- Fully-fledged video recording, resizing, and trimming
- GIF-making tools, including converting videos to GIFs
- The ability to resize images (not just crop) right from the app
- A preview of the exact size of your image
- A magnifying tool to make sure your selections are pixel perfect
- A multitude of markup and annotation options, including pens, stamps, arrows, text, speech bubbles, shapes, and more
- The ability to blur parts of your image
- A ‘simplify’ tool that removes distracting text and UI elements from parts of your image
- The ability to move UI elements around and have Snagit automatically fill the empty spaces
- The ability to automatically store multiple images – handy when making multiple selections in succession
While some of the free alternatives do offer much of the above functionality, they tend to have clunkier designs, and I haven’t quite found anything with the same ease-of-use and power as Snagit.
And that about covers it – you can now call yourself a screenshot pro.
If you liked the article, do not forget to share it with your friends. Follow us on Google News too, click on the star and choose us from your favorites.
For forums sites go to Forum.BuradaBiliyorum.Com
If you want to read more like this article, you can visit our Technology category.