#How to Set Up Flutter With Android Studio on Linux

Table of Contents
Flutter is a Google development platform that lets you write cross-platform mobile apps using one codebase. Apps are developed in Dart, a typed and object-oriented language that compiles to either native code or JavaScript. This means you can target Android, iOS, desktop operating systems, and the web with a single Flutter project.
Flutter comes packaged with a React-like framework for declaratively defining interfaces. It also ships with built-in Material Design and iOS-like components that let you quickly layer up a new interface. Developer ease-of-use is further enhanced by robust integrations with IDEs, live debugging tools, and testing libraries.
Flutter’s popularity has rapidly grown over the past few years as more developers have been tempted by its unified approach. Here’s how to start your own Flutter development environment with Android Studio on a Linux machine.
Downloading Android Studio
Begin by downloading and installing the Android Studio IDE. Android Studio is based on JetBrains’ IntelliJ IDEA and is the official development environment for the Android platform. When augmented with the Flutter plugin, it also provides a first-class development experience for Flutter apps.
Head to the downloads page and grab the latest Studio release for Linux. You’ll be prompted to accept a license agreement before the download begins.

Extract the archive once the download’s complete. The unpacked directory tree contains everything needed to run Android Studio – there’s no separate installation script. For this reason, it’s often best to extract to a directory that’s commonly used to store applications.
tar -xf android-studio-* -C /opt/android-studio
chown -R $USER:$USER /opt/android-studio
To launch Android Studio, run the studio.sh script inside the bin directory. Add this directory to your path if you’ll be using the IDE regularly. Otherwise you’ll need to specify the full path on every launch:
/opt/android-studio/bin/studio.sh &The trailing ampersand means you’ll be able to close your shell and keep using Android Studio.
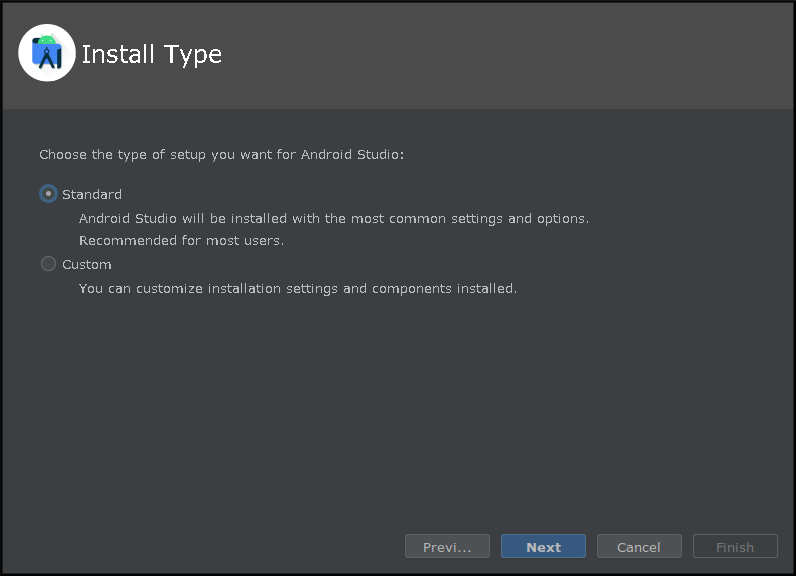
Follow the first run setup wizard to configure your IDE. For the purposes of this tutorial, you can accept the defaults and create a “Standard” installation. This will automatically download a recent Android Emulator release and the Android build tools. These will be useful later when it comes to debugging Flutter apps.
Related article: How to access Developer Options and enable USB Debugging on an Android device
If you liked the article, do not forget to share it with your friends. Follow us on Google News too, click on the star and choose us from your favorites.
If you want to read more like this article, you can visit our Technology category.


