#Windows 10 Receives New Disk Management Tool in Settings
Table of Contents
“#Windows 10 Receives New Disk Management Tool in Settings”
RECOMMENDED: Click here to fix Windows errors and optimize system performance
As you may already know, Windows 10 Insider Preview includes a set of “hidden” feature which are not accessible to regular users. Usually, the OS includes features that are not finished or can cause some unexpected behavior. The new Disk Management Tool is one of them. As of this moment, the tool is a work-in-progress, and is hidden. You need to perform extra steps to make it visible and give it a try.
The new tool, after you enable it, becomes available under Settings > Storage, with the new Manage Disks and Volumes link.

It lists all your storage devices and their partitions. For a partition, it provides the following two options:
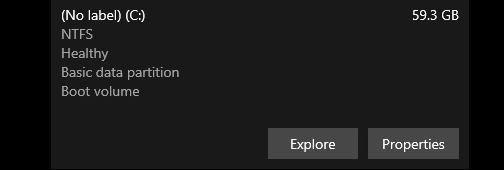
- Explore – this will simply open the selected partition/drive in the File Explorer.
- Properties – opens the next page with management tools.
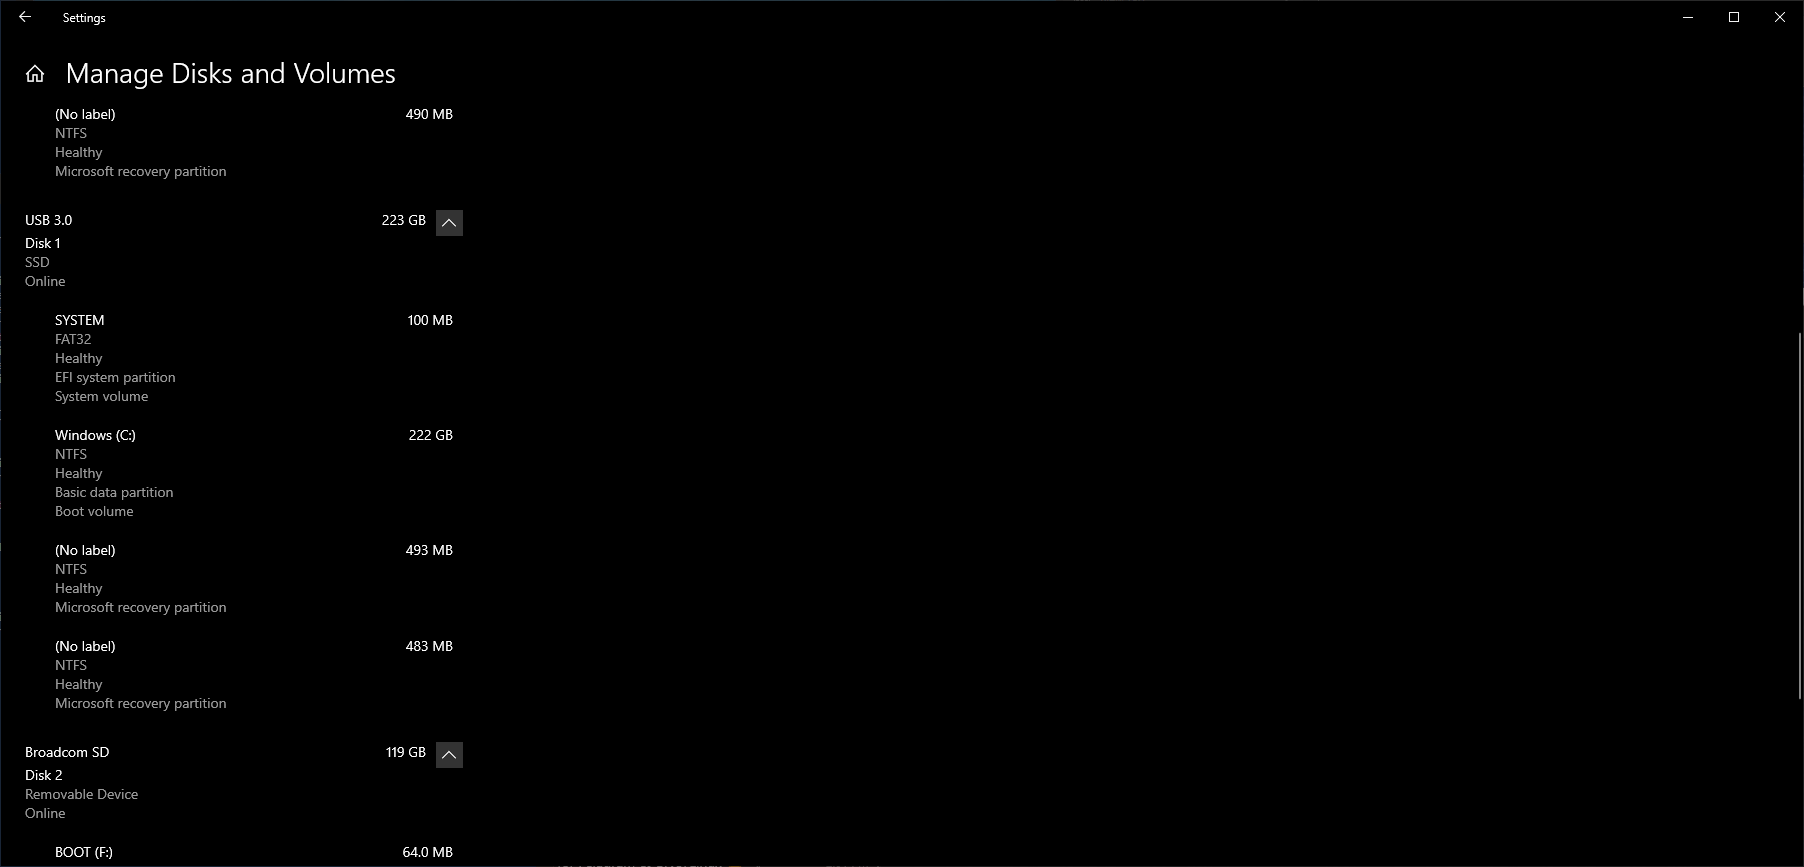
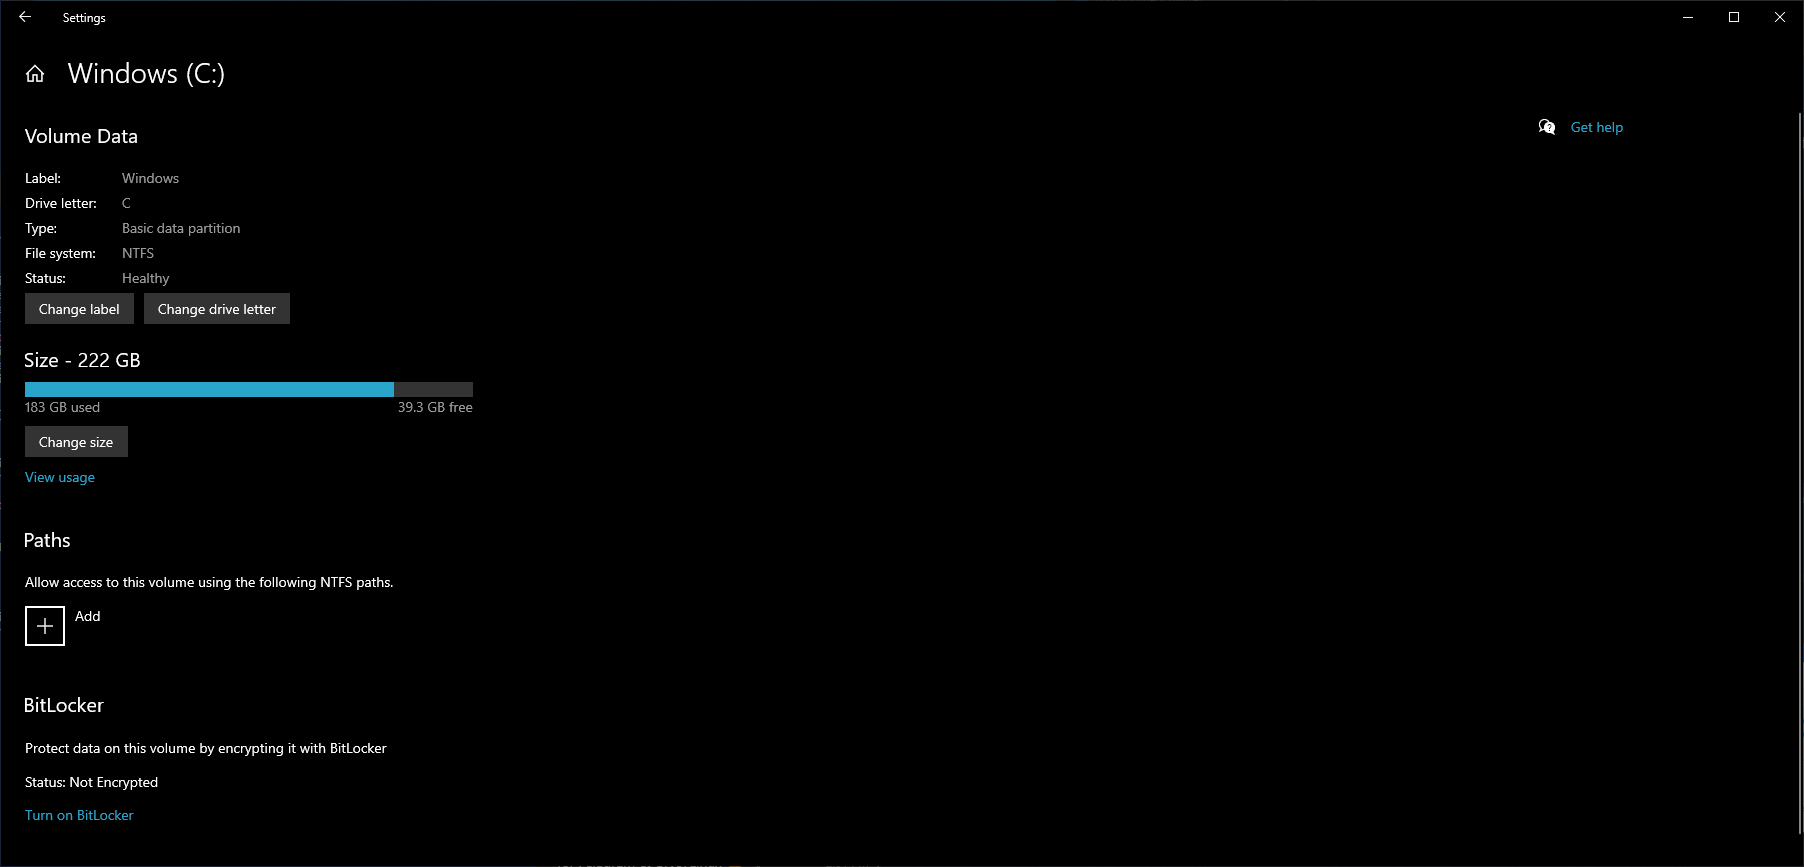
From the Properties page for a fixed drive, you can do the following things:
- Change the drive letter
- Change its label (rename the drive)
- Resize the drive – here you shrink or extend the partition.
- Add paths – allows creating extra mount points for the selected volume.
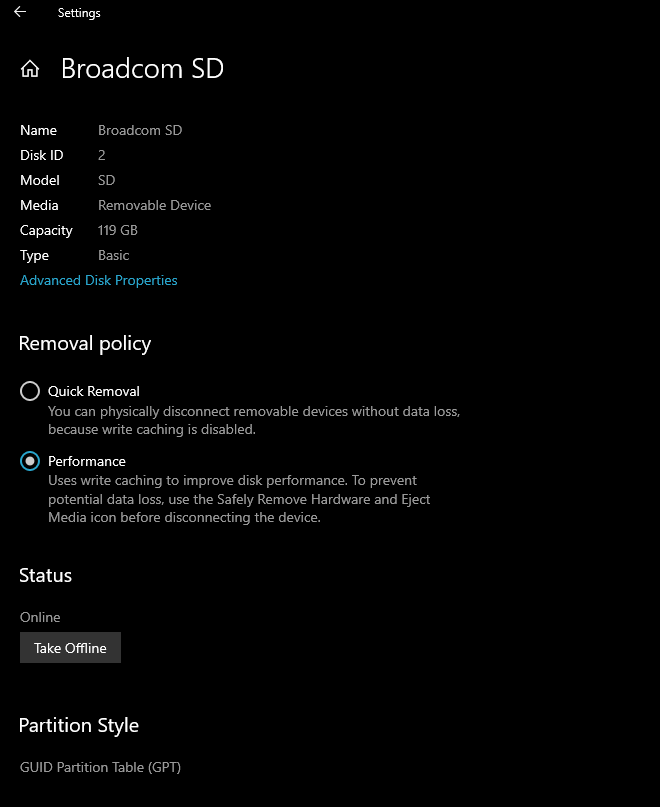
For a removable drive, the Properties page allows changing the removal policy, take it offline, and view some extra data.
And that is all at this moment. The new Disk Management tool can’t yet compete with the its classic counterpart, and it only works partially (that’s why it is hidden). However, there is no shadow of a doubt that soon it will be promoted as a primary partition management option, exactly like it had happened to the classic Disk Cleanup tool.
If you are interested in enabling this new Settings page, you need a third-party but open source tool Vive. For reference, check out this: Activate Hidden Features in Windows 10 Insider Builds.
How to Enable New Disk Management Tool in Settings
- Download the latest ViveTool release (it is 0.2.0 as of this writing).
- Unblock the downloaded file.
- Extract the archive contents to any folder you like.
- Open the command prompt or PowerShell as Administrator in that folder.
- Type the following command:
ViveTool.exe addconfig 23257398 2. If you are using PowerShell, add.to the command, as follows: .ViveTool.exe addconfig 23257398 2. - You will get a message “Successfully set feature configuration”.
You are done. The new Disk Management Tool page should become available in Settings. If not, try to restart Windows 10 to get it done.
Thanks to Windows Latest and Gustave Monce.
RECOMMENDED: Click here to fix Windows errors and optimize system performance
If you want to read more like this article, you can visit our Technology category.
if you want to watch Movies or Tv Shows go to Dizi.BuradaBiliyorum.Com for forums sites go to Forum.BuradaBiliyorum.Com