#How to Archive and Enjoy Your Old Family Photo Albums

Table of Contents
“#How to Archive and Enjoy Your Old Family Photo Albums”

Like most families, you probably have a few (or a few dozen) old photo albums lying around. Here’s what you need to do with them to preserve, enjoy, and protect them.
Step One: Sort Through Them
Photos used to be hard and expensive to take, so lots of albums are crammed with pictures that would never make the Instagram-cut now. While some of these are nice to have, there will likely be other duds, duplicates, and photos of random strangers (or relatives so distant they might as well be) that you don’t need to keep.
Before doing anything else, go through all the physical photos, and pull out the good ones. Also, take the time to sort them by the relatives that appear in them, date, and, possibly, event. It’ll make it much easier to find them again.
This is also a great time to use a photo-safe archival pen to take notes on the back of the photo. It’s even better if you can show the photos to older relatives and get details. You may have no idea who that adorable kid on the tricycle is in that old black and white photo but your grandmother will be able to tell you.
Sharpie Fine-Tip Archival Pen
Have a lot of photos to mark? This 12-pack will ensure you have plenty of photo-safe ink to scribble notes on the backs of all your pictures.
$23.04
Not only does that help preserve family memories but it might also make it easier to decide which photos to keep and which to toss. If the kid on the tricycle is your great grandfather that’s a neat photo to preserve for all time. If it’s the neighbor kid Steve, well… maybe it’s not so important.
Step Two: Scan and Digitize Them

With the photos sorted, it’s time to get them scanned. This means you’ll have digital copies to share with the rest of your family but, more importantly, that you have a backup of the fragile rare images.
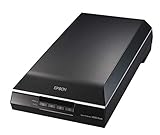
If you have the negatives or slide film, it’s worth digitizing that instead, as it will generally give you better photos. If not, you can just work with the printed images. You have two main options: Scan them yourself at home, or use a professional service. If you have a lot of photos and negatives to work through, we highly recommend the Epson Perfection V600. It’s a perfect workhorse for plowing through a large collection.
$229.99
For information on scanning and archiving your photos, check out our guide over on How-To Geek.
Step Three: Print and Share Your Favorites
Now that you’ve got your photos on your computer, it’s time for the fun bit: printing out your favorites and sharing them with your family. It’s even better if you can tie it into a big event, like a big birthday or the holidays.
Surprise everyone with a customized selection of personal photos—this is a great time to really show off with a customized photo book. Make sure to also share the full digital collection with them in case they want to print a particular photo for the fridge or such.
You should also print off a copy of the photos you love, so you can display them and have them around. It’s very easy for a photo to get misplaced if there’s only one copy. It’s not a bad idea, by the way, to have a double-print policy where you print one to display and print one to store. Speaking of that, let’s take a look at photo-safe storage.
Step Four: Store Them Properly
The hard work is done. All that remains is to store both the physical and digital photos properly, so you don’t have to worry about loss or damage again.
For the physical photos, get some proper archival storage boxes, and put your (neatly sorted!) originals in them. These boxes are designed for photos and documents, so they’ll do a better job of keeping them safe than whatever cardboard box you were using before.
For the digital photos, back them up—properly! Check out this guide on How-To Geek. There’s no point only having one digital copy. You’re even more likely to lose your images than if you have just one physical copy.
Now that you’ve taken the time to sort and organize your photos, don’t forget to put them where you can see them. Hang favorite photos in a proper frame. Add them to your Chromecast’s backdrops folder so you can see them on your television. Don’t let your digital photos gather dust like the physical photos you just rescued from the albums!
If you liked the article, do not forget to share it with your friends. Follow us on Google News too, click on the star and choose us from your favorites.
For forums sites go to Forum.BuradaBiliyorum.Com
If you want to read more like this article, you can visit our Technology category.


